Download Service Repair Manual for Mitsubishi FD20HS, FD25HS, FD30HS, FG20S, FG25S, FG30S Forklift MC.
This Factory Service Repair Manual offers all the service and repair information about Mitsubishi FD20HS, FD25HS, FD30HS, FG20S, FG25S, FG30S Forklift MC. With this in-depth & highly detailed manual you will be able to work on your vehicle with the absolute best resources available, which will not only save you money in repair bills but will also help you to look after your investment. The information on this manual covered everything you need to know when you want to repair or service on Mitsubishi FD20HS, FD25HS, FD30HS, FG20S, FG25S, FG30S Forklift MC.
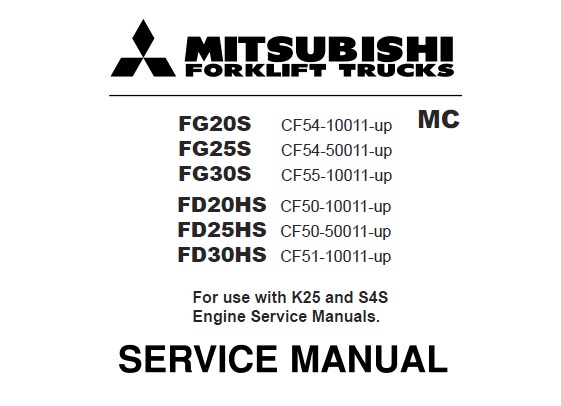
Models Covered:
FG20S CF54-10011-up
FG25S CF54-50011-up
FG30S CF55-10011-up
FD20HS CF50-10011-up
FD25HS CF50-50011-up
FD30HS CF51-10011-up
This manual is INSTANT DOWNLOAD. It means no shipping cost or waiting for getting a CD package for several days. you will receive this manual today via instant download on completion of payment via our secure payment processor.
Manual Contents:
1. Chassis and Mast Service Manual, PDF, 480 Pages
Contents:
Chapter 1 GENERAL INFORMATION
1. Model View
2. Applicable Truck Model
3. Serial Number Locations
4. Dimensions
5. Technical Data
6. Performance
Chapter 2 COOLING SYSTEM
1. Specifications
2. Structure
3. Removing Fan Belt
3.1 Preparation
3.2 Removal Sequence
3.3 Suggestions for Removal
4. Installing Fan Belt
4.1 Suggestions for Installation
5. Inspecting and Adjusting Cooling System
5.1 Fan Belt Inspection
5.2 Fan Belt Tension Adjustment
5.3 Connecting Hoses
5.4 Cooling Water
5.5 Radiator Cap
Chapter 3 ELECTRICAL SYSTEM
1. Electrical Components and Wiring Outline
1.1 Locations of Electrical Components
2. Console Box
2.1 Console Box Outline
2.2 Disassembling Console Box
2.3 Assembling Console Box
3. Meter Panel
3.1 Disassembling Meter Panel
3.2 Assembling Meter Panel
3.3 Bulb Replacement
3.4 Warning Lamps and Indicators
3.5 Hour Meter
3.6 Fuel Gauge
3.7 Connector
4. Main Electrical Components
4.1 Key Switch
4.2 Key Switch (Anti-Restart Switch)
4.3 Light Switch and Turn Signal Switch
4.4 Direction (FNR) Switch
4.5 GAS/LPG Select Switch
4.6 Horn
4.7 Tank Unit
4.8 Brake Oil Level
4.9 Stop Light Switch
4.10 Thermoswitch (Engine Coolant Temperature)
4.11 Relay
4.12 Fuse Box
4.13 Glow Timer and Glow Relay (Diesel Model)
4.14 Front Combination Light
4.15 Front Combination Harness
4.16 Rear Combination Light (Option)
4.17 Rear Combination Harness (Option)
4.18 List of Lights
5. Battery and Maintenance
5.1 State of Charge and Electrolyte SpecificGravity (S.G.) Adjustment
5.2 Specific Gravity Reading and State of Charge
5.3 Precautions for Battery Charging
6. Wire Color
6.1 List of Wire Color Codes
7. Troubleshooting
7.1 Starter System
7.2 Gauges
7.3 Lighting System
7.4 Alarm Unit
7.5 Battery
Chapter 4 POWER TRAIN
1. Installation of Engine and Transmission Assembly (for Dual Gas/LPG Models)
1.1 Removal Sequence of Overhead Guard Cover, Air Cleaner, and Others
1.2 Suggestions for Removing Overhead Guard Cover, Air Cleaner, and Others
1.3 Removal Sequence of Controls
1.4 Suggestions for Removing Controls
1.5 Suggestions for Installing Controls
1.6 Preparation for Removing Pipes and Radiator
1.7 Removal Sequence of Pipes and Radiator
1.8 Suggestions for Installing Pipes and Radiator
1.9 Preparation for Removing Engine and Transmission Assembly
1.10 Removal Sequence of Engine and Transmission Assembly
1.11 Suggestions for Removing Engine and Transmission Assembly
1.12 Suggestions for Installing Engine and Transmission Assembly
2. Installation of Engine and Transmission Assembly (for Diesel Model)
2.1 Removal Sequence of Overhead Guard Cover, Air Cleaner, and Others
2.2 Suggestions for Removing Overhead Guard Cover, Air Cleaner, and Others
2.3 Preparation for Removing Pipes and Radiator
2.4 Removal Sequence of Pipes and Radiator
2.5 Suggestions for Removing Pipes and Radiator
2.6 Suggestions for Installing Pipes and Radiator
2.7 Preparation for Removing Engine and Transmission Assembly
2.8 Removal Sequence of Engine and Transmission Assembly
2.9 Suggestions for Removing Engine and Transmission Assembly
2.10 Suggestions for Installing Engine and Transmission Assembly
Chapter 5 POWERSHIFT TRANSMISSION
1. Structure
1.1 External View of Torque Converter Transmission
1.2 External View of Control Valve
1.3 Transmission Components
1.4 Torque Converter Components
1.5 Torque Converter Drive Control Components
1.6 Schematic Diagram of Powershift Transmission Hydraulic System
2. Removing Transmission
2.1 Suggestions for Removal
3. Installing Transmission
3.1 Suggestions for Installation
4. Disassembling Torque ConverterTransmission
4.1 Preparation
4.2 Removing Transmission Accessories
4.3 Removing Oil Pump
4.4 Removing Transmission Housing
4.5 Removing Input Shaft, Idler Shaft, and Output Gear
4.6 Disassembling Transmission Housing
4.7 Disassembling Torque Converter Housing
4.8 Disassembling Idler Shaft
4.9 Disassembling Output Gear
4.10 Disassembling Forward Side Input Shaft Gear Assembly
4.11 Disassembling Reverse Side Input Shaft Gear
4.12 Disassembling Oil Pump
5. Assembling Torque Converter Transmission
5.1 Assembling Transmission Housing
5.2 Assembling Idler Shaft Assembly
5.3 Assembling Output Gear Assembly
5.4 Inspecting Input Shaft Gear Assembly
5.5 Assembling Forward Side Input Shaft Gear Assembly
5.6 Assembling Reverse Side Input Shaft Gear Assembly
5.7 Assembling and Installing Oil Pump Assembly
5.8 Assembling Torque Converter Housing
5.9 Installing Transmission Housing
5.10 Installing Transmission Accessories
5.11 Installing Servo Case Assembly
6. Disassembling Control Valve
6.1 Removing Control Valve Accessories
6.2 Removing Valve Body Plate
6.3 Removing Plugs
6.4 Removing Strainer
6.5 Disassembling Regulator Valve Section
6.6 Disassembling Accumulator Valve Section
6.7 Disassembling Inching Valve Section
6.8 Removing Oil Seal and Plug
7. Assembling Control Valve
7.1 Assembly Sequence of Control Valve
7.2 Suggestions for Assembly
7.3 Washing and Inspecting
7.4 Installing Valve Plug and Oil Seal
7.5 Assembling Inching Valve Section
7.6 Assembling Accumulator Valve Section
7.7 Assembling Regulator Valve Section
7.8 Installing Strainer
7.9 Installing Plug
7.10 Installing Valve Body Plate and Breather Cover
7.11 Assembling Control Valve Accessories
8. Inspection and Adjustment
8.1 Oil Pressure Measurement
8.2 Adjusting Brake (Inching) Pedal
8.3 Adjusting Inching Cable
9. Troubleshooting
10. Service Data
10.1 Pump Boss
10.2 Pilot Boss
10.3 Oil Pump
10.4 Flexible Plate
10.5 Clutches
10.6 Input Shaft
Chapter 6 FRONT AXLE AND REDUCTION DIFFERENTIAL
1. Structure
1.1 2 Ton Class
1.2 3 Ton Class
2. Removing Front Wheels
2.1 Preparation
2.2 Removal
3. Installing Front Wheels
4. Removing Front Axle and Reduction Differential
4.1 Preparation
4.2 Removal Sequence
4.3 Suggestions for Removal
5. Installing Front Axle
6. Disassembling Front Axle
6.1 Disassembly Sequence
6.2 Suggestions for Disassembly
7. Inspection and Repair After Disassembling Front Axle
8. Assembling Front Axle
9. Disassembling Reduction Differential
9.1 Disassembly Sequence
9.2 Suggestions for Disassembly
10. Inspection and Repair After Disassembling Reduction Differential
11. Assembling Reduction Differential
11.1 Assembly Sequence
11.2 Suggestions for Assembly
11.3 Adjustment
12. Troubleshooting
13. Service Data
13.1 Hub and Wheels
13.2 Reduction Differential
Chapter 7 REAR AXLE
1. Rear Axle Structure
1.1 Main Components
1.2 Specifications for Wheel Alignment and Steering Angle
1.3 Main Components of Wheel Hub Section
1.4 Main Components of Kingpin Section
1.5 Main components of Tie Rod Section
1.6 Main Components of Rear Axle Center Section
1.7 Main Components of Steering Cylinder
2. Removing Rear Wheels
2.1 Suggestions for Removal
3. Installing Rear Wheels
4. Removing Rear Axle Assembly
4.1 Removal Sequence
4.2 Suggestions for Removal
5. Inspection and Repair After Disassembling Rear Axle Assembly
6. Installing Axle Assembly
7. Disassembling Wheel Hub
7.1 Disassembly Sequence
7.2 Suggestions for Disassembly
8. Inspection and Repair After Disassembling Wheel Hub Section
9. Assembling Wheel Hub Section
9.1 Suggestions for Assembly
9.2 Assembling and Adjusting Wheel Bearing
10. Disassembling Knuckle Section (Kingpin)
10.1 Preparation
10.2 Suggestions for Disassembly
11. Inspection After Disassembly Knuckle Section (Kingpin)
12. Assembling Knuckle Section (Kingpin)
12.1 Suggestions for Assembly
13. Removing Steering Cylinder
13.1 Preparation
13.2 Suggestions for Removal
14. Disassembling Steering Cylinder
14.1 Disassembly Sequence
14.2 Suggestions for Disassembly
15. Inspection and Repair After Disassembling Steering Cylinder
16. Assembling Steering Cylinder
16.1 Suggestions for Assembly
17. Disassembling Tie Rod
17.1 Disassembly Sequence
17.2 Suggestions for Disassembly
18. Assembling Tie Rod
18.1 Suggestions for Assembly
Chapter 8 BRAKE SYSTEM
1. Structure of Brake System
2. Disassembling Master Cylinder
2.1 Disassembly Sequence
3. Inspection and Repair After Disassembling Master Cylinder
4. Assembling Master Cylinder.
4.1 Suggestions for Assembly
5. Structure of Wheel Brakes
6. Disassembling Wheel Brakes
6.1 Preparation
6.2 Disassembly Sequence
6.3 Suggestions for Disassembly
7. Inspection and Repair After Disassembling Wheel Brakes
8. Assembling Wheel Brakes
8.1 Assembly Sequence
8.2 Suggestions for Assembly
9. Disassembling Wheel Cylinder
9.1 Disassembly Sequence
10. Inspection and Repair After Disassembling Wheel Cylinder
11. Assembling Wheel Cylinder.
12. Inspecting and Adjusting Brake System
12.1 Operation Test of Automatic Adjuster
12.2 Manual Adjustment Procedure
12.3 Adjusting Parking Brake Cable
12.4 Adjusting Brake Pedal
12.5 Bleeding Brake Oil Line
12.6 Braking Performance Test
12.7 Adjusting Parking Brake Lever
13. Troubleshooting
14. Service Data
Chapter 9 STEERING SYSTEM
1. Structure and Functions
1.1 General
1.2 Steering Valve
1.3 Steering Column
2. Disassembling and Assembling Pipes and Hoses
2.1 Suggestions for Disassembly and Assembly
3. Disassembling Steering Wheel and Steering Valve
3.1 Disassembly Sequence
3.2 Suggestions for Disassembly
4. Installing Steering Wheel and Steering Valve
5. Installation
5.1 Inspection After Installation
6. Removing Steering Valve
7. Installing Steering Valve
8. Disassembling Tilt Lock Lever
9. Assembling Tilt Lock Lever
10. Disassembling Steering Valve
10.1 Disassembly Sequence
10.2 Suggestions for Disassembly
11. Inspection After Disassembly
12. Assembling Steering Valve
12.1 Assembly Sequence
13. Troubleshooting
14. Service Data
Chapter 10 HYDRAULIC SYSTEM
1. Structure and Functions
1.1 Outline
1.2 Hydraulic Lines Diagram
1.3 Hydraulic Tank
1.4 Gear Pump
1.5 Control Valve
1.6 Down Safety Valve
1.7 Lift Cylinder (First Cylinder for Duplex and Triplex Mast)
1.8 Lift Cylinder (Second Lift Cylinder for Simplex Mast and Triplex Mast)
1.9 Lift Cylinder (Second Lift Cylinder for Duplex Mast)
1.10 Tilt Cylinder
2. Removing Hydraulic Pump
2.1 Removal Sequence
2.2 Suggestions for Removal
3. Installing Hydraulic Pump
3.1 Suggestions for Installation
4. Disassembling Hydraulic Pump
4.1 Disassembly Sequence
4.2 Suggestions for Disassembly
5. Inspecting and Repairing Hydraulic Pump
6. Assembling Hydraulic Pump
6.1 Suggestions for Assembly
6.2 Operation Test
7. Removing Lift Cylinders
8. Disassembling Lift Cylinder (First Cylinder for Duplex and Triplex Masts)
8.1 Disassembly Sequence
8.2 Suggestions for Disassembly
9. Inspecting Lift Cylinder (First Cylinder for Duplex and Triplex Masts)
10. Assembling Lift Cylinders (First Cylinder for Duplex and Triplex Masts)
10.1 Assembly Sequence
10.2 Suggestions for Assembly
11. Disassembling Lift Cylinder (Second Cylinder for Simplex Mast and Triplex Mast)
11.1 Disassembly Sequence
11.2 Suggestions for Disassembly
12. Inspecting Lift Cylinder (Second Cylinder for Simplex Mast and Triplex Mast)
13. Assembling Lift Cylinders (Second Cylinder for Simplex Mast and Triplex Mast)
13.1 Assembly Sequence
13.2 Suggestions for Assembly
14. Removing Tilt Cylinders
14.1 Preparation
14.2 Removal Sequence
14.3 Suggestions for Removal
15. Installing Tilt Cylinders
15.1 Suggestions for Installation
16. Disassembling Tilt Cylinder
16.1 Disassembly Sequence
16.2 Suggestions for Disassembly
17. Inspection After Disassembling Tilt Cylinder
18. Assembling Tilt Cylinder
18.1 Assembly Sequence
18.2 Suggestions for Assembly
19. Piping
19.1 Piping for Diesel Engine Models
19.2 Piping for Dual Gas/LPG Engine Models
20. Removing Suction Strainer and Return Filter
20.1 Removal Sequence
20.2 Suggestions for Removal
21. Inspecting Suction Strainer and Return Filter
22. Installing Suction Strainer and Return Filter
22.1 Suggestions for Installation
23. Inspection and Adjustment
23.1 Inspecting and Adjusting Hydraulic Tank
23.2 Inspecting Control Valve
23.3 Vertical Drift Test
23.4 Tilt Drift Test
24. Troubleshooting
24.1 Hydraulic Tank
24.2 Gear Pump
24.3 Control Valve
24.4 Lift and Tilt Cylinders
25. Service Data
25.1 First Cylinder for Duplex and Triplex Masts
25.2 Second Cylinder for Simplex and Triplex Masts
25.3 Second Cylinder for Duplex Mast
25.4 Tilt Cylinder
26. Outline of Control Valve
26.1 Hydraulic Lines Diagram of Hydraulic Control Valve
26.2 Inlet Section
26.3 Lift and Tilt Section (Lift Function)
26.4 Lift and Tilt Section (Tilt Function)
26.5 Unload Valve
27. Removing Control Valve
27.1 Removal Sequence
28. Installing Control Valve
28.1 Suggestions for Installation
29. Disassembling Control Valve – Inlet Section
29.1 Disassembly Sequence
29.2 Suggestions for Disassembly
30. Disassembling Control Valve – Lift Valve
30.1 Disassembly Sequence
30.2 Suggestions for Disassembly
31. Disassembling Control Valve – Tilt Valve
31.1 Disassembly Sequence
31.2 Suggestions for Disassembly
32. Disassembling Control Valve – End Cover Section
32.1 Disassembly Sequence
33. Disassembling Control Valve – End Cover Section
34. Assembling Control Valve – End Cover Section
34.1 Suggestions for Assembly
35. Assembling AttachmentSection (Option)
35.1 Assembly Sequence
35.2 Suggestions for Assembly
Chapter 11 MAST AND FORKS
1. Simplex Mast
1.1 Mast System
1.2 Structure and Functions (5V25D to 5V30D)
1.3 Removal Sequence of Mast and Lift Bracket Assembly
1.4 Suggestions for Removing Mast and Lift Bracket Assembly
1.5 Suggestions for Installing Mast and Lift Bracket Assembly
1.6 Removal Sequence of Mast and Lift Bracket
1.7 Suggestions for Disassembling Mast and Lift Bracket
1.8 Inspection of Mast and Lift Bracket (All MastModels)
1.9 Assembly Sequence of Lift Bracket Roller (All Mast Models)
1.10 Lift Bracket Clearance Adjustment (All Mast Models)
1.11 Installing Mast Rollers (All Mast Models)
1.12 Installing Mast Strips (All MastModels)
1.13 Installing Lift Cylinders
1.14 Connecting Chains
1.15 Installing Hydraulic Lines
1.16 Removing and Installing Mast Rollers and Strips Without Removing Mast from Truck
1.17 Inspection and Adjustment
1.18 Inspecting Forks (All Mast Models)
1.19 Inspecting and Adjusting Chain Tension (All Mast Models)
1.20 Measuring Chain Elongation (All Mast Models)
1.21 Adjusting Clearance Between LiftBracket Roller and Inner Mast (All Mast Models)
1.22 Adjusting Mast Roller Clearance (All Mast Models)
1.23 Inspecting and Adjusting Mast Strip Clearance (All Mast Models)
1.24 Adjusting Mast Tilt Angle (All Mast Models)
1.25 Inspecting and Adjusting Right and Left Lift Cylinder Stroke (All Mast Models)
1.26 Troubleshooting
1.27 Service Data
2. Duplex Mast
2.1 Mast System
2.2 Structure and Functions (5F25C to 5F30C)
2.3 Removal Sequence of Mast and Lift Bracket Assembly
2.4 Suggestions for Removing Mast and Lift Bracket Assembly
2.5 Suggestions for Installing Mast and Lift Bracket Assembly
2.6 Disassembly Sequence of Mast and Lift Bracket
2.7 Preparation for Disassembling Mast and Lift Bracket
2.8 Suggestions for Disassembling Mast and Lift Bracket
2.9 Inspection of Mast and Lift Bracket (All MastModels)
2.10 Assembly Sequence of Lift Bracket Roller (All Mast Models)
2.11 Lift Bracket Clearance Adjustment (All Mast Models)
2.12 Installing Mast Rollers (All Mast Models)
2.13 Installing Mast Strips (All Mast Models)
2.14 Installing Second Lift Cylinder
2.15 Installing First Lift Cylinder
2.16 Connecting Chains
2.17 Installing Hydraulic Lines
2.18 Removing and Installing Mast Rollers and Strips Without Removing Mast from Truck
2.19 Inspection and Adjustment
2.20 Inspecting Forks (All Mast Models)
2.21 Inspecting and Adjusting Chain Tension (All Mast Models)
2.22 Measuring Chain Elongation (All Mast Models)
2.23 Adjusting Clearance Between LiftBracket Roller and Inner Mast (All Mast Models)
2.24 Adjusting Mast Roller Clearance (All Mast Models)
2.25 Inspecting and Adjusting Mast Strip Clearance (All Mast Models)
2.26 Adjusting Mast Tilt Angle (All Mast Models)
2.27 Inspecting and Adjusting Right and Left Lift Cylinder Stroke (All Mast Models)
2.28 Troubleshooting
2.29 Service Data
3. Triplex Mast
3.1 Mast System
3.2 Structure and Functions (5M25D to 5M30D)
3.3 Removal Sequence of Mast and Lift Bracket Assembly
3.4 Suggestions for Removing Mast and Lift Bracket Assembly
3.5 Suggestions for Installing Mast and Lift Bracket Assembly
3.6 Disassembly Sequence of Mast and Lift Bracket (All Mast Models)
3.7 Preparation for Disassembling Mast and Lift Bracket
3.8 Suggestions for Disassembling Mast and Lift Bracket
3.9 Inspecting Mast and Lift Bracket (All Mast Models)
3.10 Assembly Sequence of Lift Bracket Roller (All Mast Models)
3.11 Lift Bracket Clearance Adjustment (All Mast Models)
3.12 Installing Mast Rollers (All Mast Models)
3.13 Installing Mast Strips (All Mast Models)
3.14 Installing Second Lift Cylinder
3.15 Installing First Lift Cylinder
3.16 Connecting Chains
3.17 Installing Hydraulic Lines
3.18 Removing and Installing Mast Rollers and Strips Without Removing Mast from Truck
3.19 Inspection and Adjustment
3.20 Inspecting Forks (All Mast Models)
3.21 Inspecting and Adjusting Chain Tension (All Mast Models)
3.22 Measuring Chain Elongation (All Mast Models)
3.23 Adjusting Clearance Between LiftBracket Roller and Inner Mast (All Mast Models)
3.24 Adjusting Mast Roller Clearance (All Mast Models)
3.25 Inspecting and Adjusting Mast Strip Clearance (All Mast Models)
3.26 Adjusting Mast Tilt Angle (All Mast Models)
3.27 Inspecting and Adjusting Right and Left Lift Cylinder Stroke (All Mast Models)
3.28 Troubleshooting
3.29 Service Data
Chapter 12 SERVICE DATA
1. Maintenance Schedule
2. Tightening Torques for Standard Bolts and Nuts
2.1 Metric Fine Thread
2.2 Metric Coarse Thread
3. Periodic Replacement Parts
3.1 Safety Critical Parts
4. Lubrication Schedule
4.1 Lubrication Chart
4.2 Fuel and Lubricant Specifications
4.3 Adjustment Value and Oil Capacity
5. Special tools
5.1 Special Service Tools (Powershift Transmission)
5.2 Special Service Tools (Front Axle and Reduction Differential)
5.3 Special Service Tools (Brake System)
5.4 Special Service Tools (Steering System)
5.5 Special Service Tools (Hydraulic System)
Chapter 13 HOW TO READ CIRCUIT DIAGRAMS
1. Description of Circuit Diagrams
1.1 Circuit Diagrams
1.2 Connector Diagrams
2. How to Read Circuit Diagrams
2.1 Symbols
2.2 Sheet Symbol
2.3 Connecting Lines
2.4 Equipment
2.5 Relay Contactor and Coil
2.6 Connectors
2.7 Indication of Connecting Line
2.8 Indication of GND (Earth)
2.9 Indication of Another Specification
3. How to Read Connector Diagrams
Chapter 14 CIRCUIT DIAGRAM FOR DUAL GAS/LPG ENGINE MODELS
Chapter 15 CIRCUIT DIAGRAM FOR DIESEL ENGINE MODELS
2. S4S Diesel Engine (Tier 2) Service Manual, PDF, 165 Pages
3. K15, K21, K25 Gasoline Engine Service Manual, PDF, 232 Pages
This manual can be used by anyone from a first time owner/amateur to a professional technician.Even the most novice mechanic can also easily follow the step-by-step guides which are made simple by the illustrations and drawings. Keep this manual handy and use it often. Performing routine, preventive maintenance will save you time & money by helping to prevent premature failure and unnecessary repairs.
Your will receive a download link immediately after your payment is completed successfully. So please make sure your email address is correct. Check spam / junk if can’t find the new message in your email inbox.
File Format: PDF
Compatible: All Versions of Windows & Mac
Language: English